I think having the basics of any outfit looks great. But when you add little details here and there, whether it be props or just choosing a specific material that adds texture, it provides a little more depth to the outfit and makes it appear more realistic. Let's start with the following props I got from 3dMasterPro on etsy.com : the "comlink, holo-projector and aqua-breather" as they're described in the etsy shop.
These seem to be really good quality and were fun to incorporate into the cosplay! More pics showing the details on the back and size comparison.
The aqua-breather has two joints that allow the 'arms' to rotate both directions>
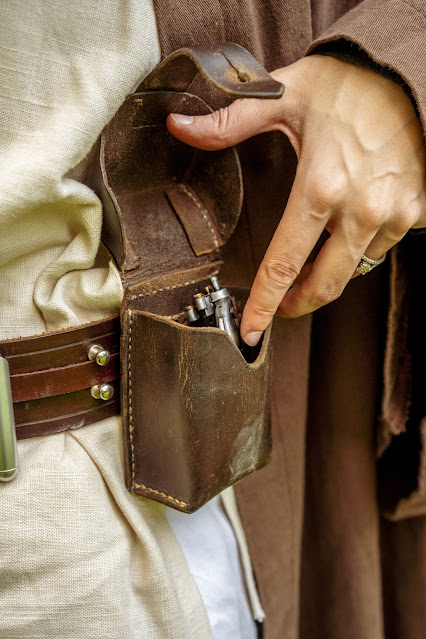
Let's move on to the pouches. One thing to keep in mind is whatever pouch you get, if you're using these^ that they fit. (And that the pouches will fit on whatever belt you decide to use.) I bought three and then also made one that would fit the aqua breather.
^by Glass Bottle Photo
I decided to make the second pouch I'd be using for this outfit for a couple reasons- I had extra leather that I wanted to use up, I could make one that I knew would fit the aqua-breather, and I wanted a unique look. I won't go into too much detail with the process but it took a couple weeks to measure it out, cut the leather, figure out how it would bend and close, and stay closed, attach to the belt and be sturdy but not too heavy. I used both sinew and thread to sew it together. It's not perfect but I'm happy with the end result. Some of the leather and the sinew is from Michael's.
^by Glass Bottle Photo
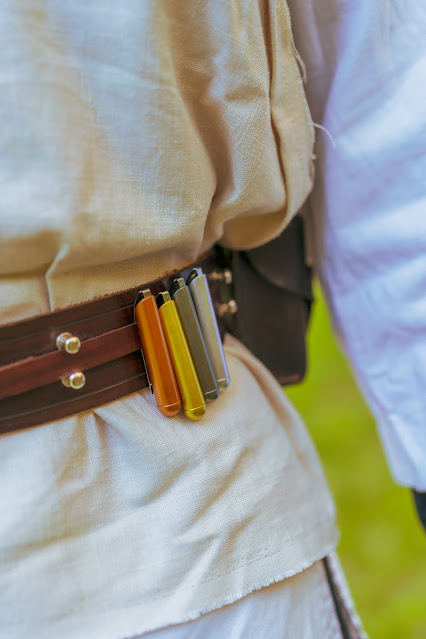
The food capsules are also from JediRobeAmerica, the etsy shop where I got the robe from. Let's be honest, these are probably modified pen caps or the like, but I didn't mind paying for them because it would've been extra hassle to try and make them myself. I already spent all that time making a pouch! They do fit well with the rest of the outfit. The ends unscrew so you can actually put something inside them, too!
Finally, onto the belt. I got mine from Asphodel'sAttic also on etsy. They make their belts by hand and are open to customization. And they are indeed well-made.
I got a discounted one (I believe there was a sale of some sort). So, of the remaining choices, I chose one that was the closest to fitting me. And it came with a piece of leather they call a 'keeper' (may be the case for all of their belts). While the set of snaps allows for length adjustment, the 'keeper' helps to hide or disguise them. The belt was just a little too small. Like just a tad. A smidgen. It did fit but I wanted it a little more loose, especially considering it was going over three layers of clothing (something to consider for yourself).
Let me be clear, I was aware of the size when I bought it, my intention was to save money and modify the previously mentioned piece of leather to further extend the belt length. And that's what I did:
I started by cutting off a 1" strip on each side with the snaps. Why one inch? Because the width of my belt was 2". It was also to have an equal amount of leather surrounding the snap, just to have it look nicer, and it worked out to 2" so hurray!
This is before sewing the two strips together to make sure they would line up ok. The great thing about this is that it still works to extend the length.
Doing this added about another 4".
Poked some holes and sewed them together with sinew:
I really don't mind the snaps showing, and with the robe on, you can't see it anyway!
^by Glass Bottle Photo
I'll add one last cool item that I got from LaserBrainStudio on etsy.com > an acrylic LED 'hologram' of Kenobi with a remote included. This thing was so cool and made such an awesome photo!
^by Glass Bottle Photo (in the edited version, we removed the base stand so that it looks like the hologram is actually being projected from the prop holo-projector)
That's it for this walk-through! I hope this was helpful in some way. Thanks for reading and may the force be with you!
JEDI COSPLAY PHOTOSHOOT (how we got some of these^ amazing photos)>
https://www.youtube.com/watch?v=QpocEYfB1R8
GLASS BOTTLE PHOTO>
https://www.glassbottlephoto.com/


